Showing posts with label silk drapery panels. Show all posts

Wednesday, November 25, 2015

Window Treatments hanging from what? Knobs, Rods, Hooks, and Whatever Else You Can Think Of

There are many different ways to hang a window treatment these days. Unique ideas can really help to achieve that "wow" factor you are going for. This post will focus on unconventional as well as conventional ways to hang window treatments.
Drapery Hardware can vary from a knob to a full length drapery rod with finials, rings and brackets. Materials used to manufacture the hardware range from metal, stainless steel, resin, and wood.
The ways to use these elements in window treatment designs are only limited by your imagination!

The Helser Brothers have come up with some Old World Style wrought iron scrolls in their Artigiani Collection using two back to back finials attached to a vertical finial mount bracket. The design shown in this dining room area curved bay window alcove with a multi-layered tray ceiling calls for something special. Silk, chenille and wrought iron definitely answer that call. Note the use of the paint on the tray ceiling calls attention to the eye and draws you upward toward that beautiful scroll hardware. The use of interlining with the silk adds body to the panels.
Go check out the entire Helser Brothers Line of drapery hardware on their website.


Adding drama to a particular area of a home can be done with the use of silk, fullness, interlining, and long lengths.
This design was found on CustomCreationsbySheri from Dysert Iowa. These dramatic silk drapery panels are punctuated with an overlay valance creating depth. The full length panels with a contrasting pleat insert bring drama and warmth to this formal living room area. The rounded shape of the window grouping is framed by the wooden rods with finials. The multi layered design has the panels hung by a rod pocket versus wooden rings. The overlay valance is also hung by a rod pocket instead of rings.  Notice the placement of the pattern on the overlay valance.

The following window treatment design for a dining area, focuses on the use of pattern and color to bring interest to the otherwise plain decor. The drapery hardware used is a small diameter metal rod with metal rings and a corner joint that makes it a one piece unit allowing the crown molding to be highlighted and uninterrupted. Note the width of the drapery wouldn't allow the panels to cover the window space if they were drawn. These drapery panels remain stationary, but provide just enough pizazz to complete the room.
To see more designs from this Texas based designer, visit their site here.

For a modern sleek look, it can be a challenge to find a hardware piece to compliment the space without overdoing it. One of my "go to" drapery hardware companies is JAB. Most of their lines are contemporary and modern. A favorite of contemporary clients is the Metropolitan line. JAB is a European company with roots in Germany.
The image below depicts the JAB stainless steel flat curtain rod with a low profile and clean lines.

 The following image was found on Pinterest and is an idea of how to solve a window treatment for an arched window frame. The sheer is mounted to the wall with small rings that are screwed into the plaster. There are small sewn portions of the fabric that are gathered onto the rings with a piece of thread wrapped around each ring.  Many more variations of this can be accomplished with heavier fabrics that are lined. The dips in the fabric can be spaced closer together so that minimal light shows through at the top of the design. Hooks can be attached to the back of the treatment and attach to each of the rings.
The image below was found on google and represents another variation of using knobs to attach a valance to the wall. The soft flowing folds are just enough to block out harsh rays of sun that come in through the upper portion of the window, yet still allow plenty of view.
This image was found on Google.com.
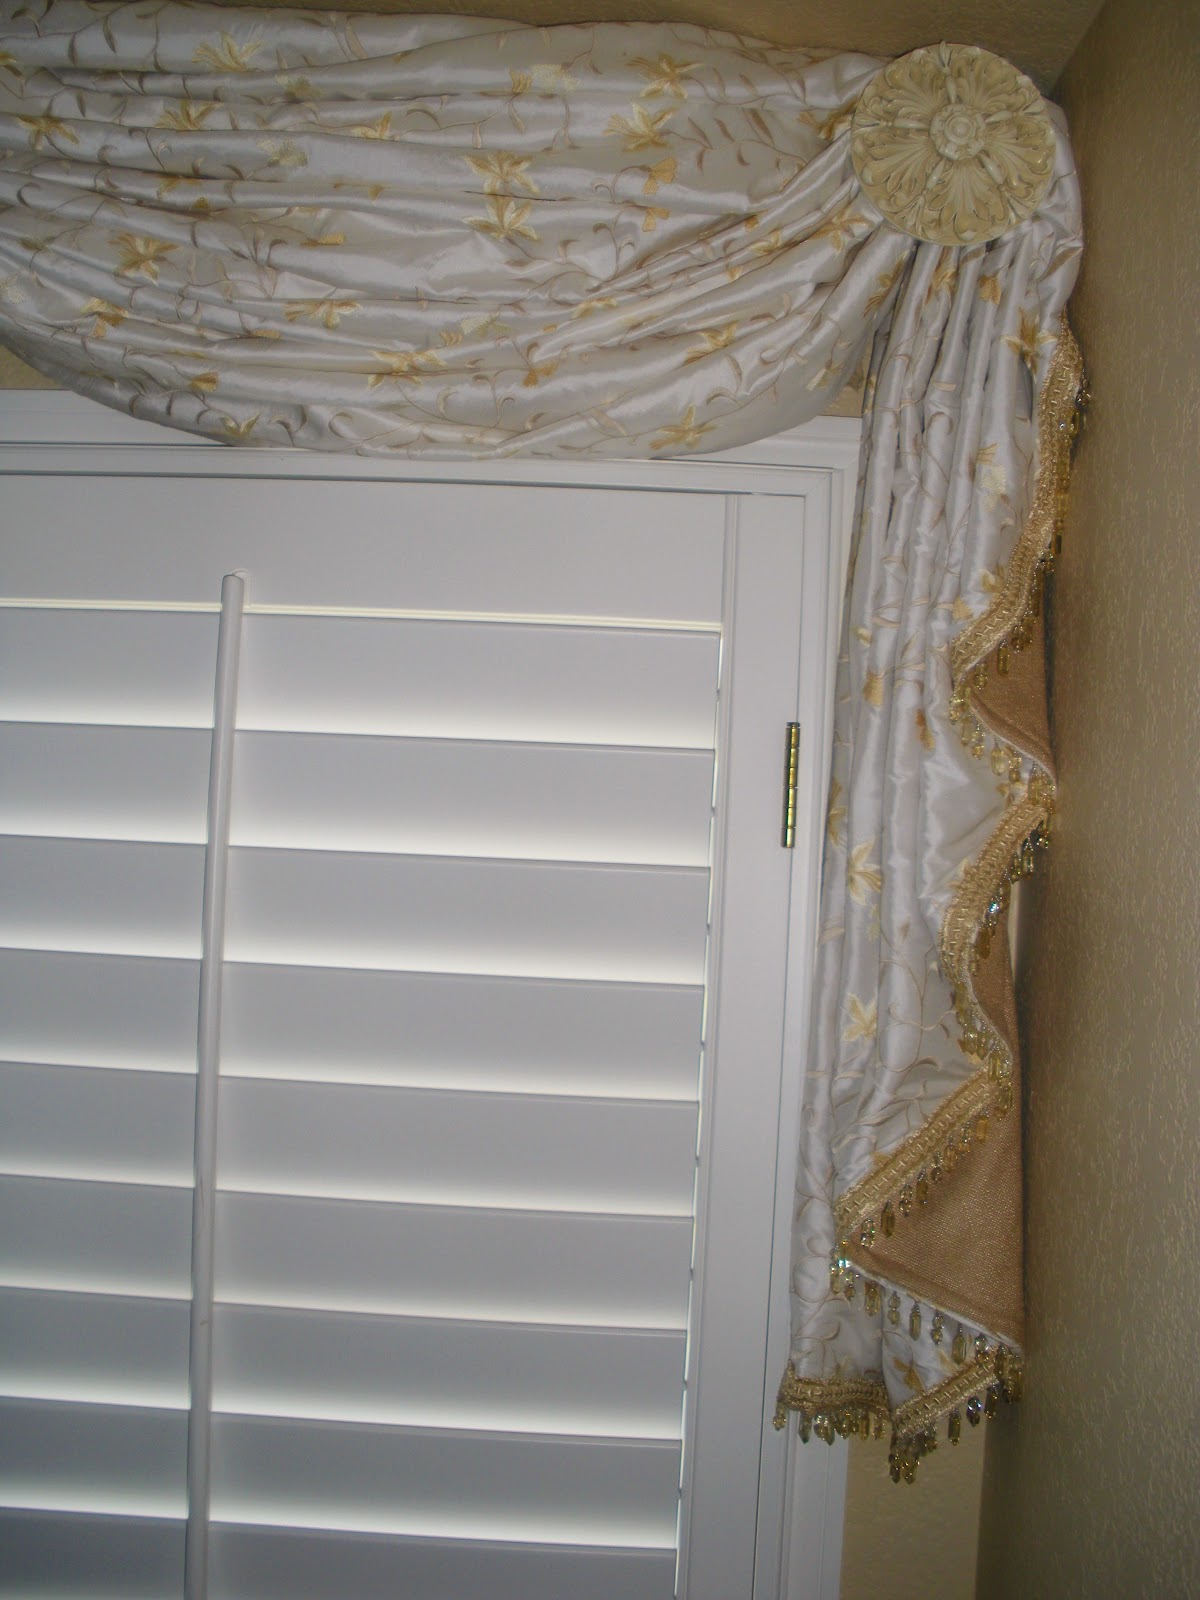
Knobs like the ones in the valance example can be purchased as "tiebacks" or "holdbacks" from the Kirsch Designer Metals Collection.  They are available in two sizes 3" and 4" diameter.

Finials can also be used as knobs when attached to the Kirsch finial adapters as shown in the image below of a curved bay window with stationary drapery panels mounted on the finials. This design eliminates the need for a rod with multiple bends and curves. It is a bit labor intensive during installation as there are 5 to 6 finials on each panel and there are 6 panels.


The image below is an example of a traditional rod used in a non-traditional way. The length of the rod is just enough to hold the stationary panel in place with finials, rings and brackets.
The image below uses resin holdbacks mounted on 6" posts for a traditional style window treatment that was needed above plantation shutters. Dupioni embroidered silk swags that are hung from holdback posts provide a less structured approach to the scarf type window treatment. Pieces of wadded up wrapping paper were used in longer lengths of the scarf to add body and to make it stay in place.
Hopefully this post has inspired you to think "outside the box" when it comes to the use of different types of hardware to mount your window treatments for a look that really says "wow"!

Wednesday, December 10, 2014

13 ft wide bay window

Bay windows can range in shape and size from a small 6 foot wide space up to 20 feet wide. This particular bay was 13.5 feet wide. There were two 90 degree bends and 6 individual window frames and 3 different width.
We also had to deal with 5 5/8" ceiling crown molding. 
There was a false tray ceiling that appeared to be a channel type of structure (metal strapping not wood beams).  We planned to use ceiling mount.
Another issue we had to overcome was the freight elevator height was 8 ft and diagonally it was 11.5 ft.  Installation was on the 10th floor so stairs weren't an option.
The client wanted to separate the alcove seating area in this bedroom from the sleeping area with a large drapery.
We decided to use silk and that decision really made a stunning impact on the room.
On the six individual frames we used a cornice on each one in order to highlight them as well as cover up the rollers on the shades that had no valances on them.
 

Dealing with obstacles & crown molding 
A couple of things to consider with crown molding:
1) If you desire a ceiling mount on the track and you want it to be wall to wall or "bracket to bracket" the crown molding will impact your overall width
2) If you plan to install a valance or cornice from the ceiling, your crown molding will also "interfere" with your valance installation as well.


Your accurate measurements will be key to ensuring your workroom has the proper calculations to fabricate your drapery and valance.
When measuring for a ceiling installation of this width, it is always best to take at least 6 ceiling to floor measurements across the width of your planned track placement. The heights can vary as much as an 1" to 1 1/2".
We ended up with a very stunning result on this one as the photos reveal.

Here is a before photo for reference:

First let's talk about the crown molding and how we managed to go around it with our cornice type valance.
The valance shown below in fabrication, had to be cut out on the ends to accommodate the crown molding.  With the use of high school math we figured out the angles and the amount to cut.
The cornice with a crown molding cut out

You use a speed square tool and a tape measure to take the measurements. See wiki-how for directions on using a speed square or go to You tube
There are two measurements you need (height & width):
1) height = Distance from the ceiling to the bottom of the crown molding
2) width = Distance from the wall to the edge of the crown molding on the ceiling
These two numbers are used to come up with the angle used to cut off the end of the cornice so it will fit into the corner and bypass your crown molding.


The cornice had to be split into two pieces and reassembled on site due to the client's freight elevator being less than the finished width of the cornice. We fabricated it as one piece and then cut a piece out for later placement at the job site.  The valance was folded in half and wrapped for transport. Then upon arrival at installation site, we used a couple of metal plates and pre-drilled the piece of wood and re joined it together.  On the back side, we stapled a piece of lining over the metal plates to make it look finished.


Below are a couple of close ups of the cornices we used in the 6 individual windows in the bay window.  There are two each of the 3 different sizes. 


Note that the larger the width the wider the accent fabric on the ends.

We had to have the ceiling track fabricated in two pieces as well. It was reassembled on site.
The track is from Kirsch and it was purchased from Williamson Supply Company in Houston.
The track has been very reliable and performs well in heavy drapery (over 60 lbs) every time I've used it.
 Here is the KS track from Kirsch.com ceiling mounted with the heavy duty splicer.
Ceiling mounted Kirsch KS track
 The drapery weight was well over 50 lbs due to the four layers of treatment. The four layers consisted of the face fabric (silk), 10oz per yard interlining, black sateen and 3 pass Australian blackout lining.  The Kirsch KS track with heavy duty ball bearing glides handles this with no problem.
 

Close up of the roman shade on patio door


View showing the drapery closed
The sides of the drapery were under a bit of tension and puckering resulted. Adjustments were made on this a few weeks later and the following pics were result.
 
2 sections 12 inches each were placed on either side to lessen any puckering or tension on the drapery
To ensure the best blackout near the crown molding we installed these "wings" of blackout near the sides onto the back of the track and secured them to the wall with cup hooks.