Showing posts with label bay window drapery ideas. Show all posts

Friday, August 24, 2018

Curtains for Tall Windows

The client had a bay window with the height of 13 feet. Currently there were white linen curtain panels hanging on the outside of the bay alcove. This made the room look small and didn't do much for the light blockage either. A Creative Touch Draperies & Interiors offered the client shutters and full length drapery panels as the solution.
The client wanted full blackout lining included in the full coverage drapery panels for this window.
The shutters were inside mounted for the best integrated look on the bay window.
The drapery panels design included a ceiling mounted traverse curtain rod that would follow the curves of the bay window. The curtains would open and close with an acrylic wand that would hang behind the curtain and not show.
Bay Window Curtains for tall windows over 10 feet
The client had musical equipment as well as a large hand loomed rug in the room and wanted UV protection. Also the room would become quite warm with the Southern exposure. Shutters were added to the bottom windows on the 3 bay windows and the top transom windows were left open. The curtains with blackout lining would provide the coverage desired at the top of the transom window area.
Acrylic wands used to open and close blackout lined curtain
The curtain and rod that were already in place are shown in the before images below:
Before image showing the rod on the outer area of the bay window alcove

Before showing both the new rod installed and the old rod still in place

Before bay window drapery panels and metal traverse rod installation
The acrylic wands were 72" long to provide plenty of leverage when opening and closing the blackout lined curtain panels. The ball bearing glides installed inside the ceiling mounted track allows for ease of opening and closing the 13 foot high curtain panels. The client wanted the bottom hems to pool and give a casual effect.
The challenges were the ceiling mounted traverse rod as well as the height of the window being over 13 feet tall. Also the weight of the drapery panels upon completion. The fabric weight plus the blackout lining also added additional weight to the treatment.
An 8 foot ladder had to be used to accommodate the installation of the metal traverse rod. Ball bearings assist the sliding of the curtain through the metal track to open and close the panels.
Preparing for the traverse metal rod installation
The challenge on a ceiling installation like this can be the materials used to create the inset alcove can crumble when drilled into. Also, you can run into metal on the inset as well and when drilling, the top plaster can crumble off leaving a large hole to deal with. If you have wood underneath, then things are good. On  the holes that had to be drilled for this install, only 2 did not hit wood. This was acceptable as there were 3 connection points on each bracket.

Wednesday, January 7, 2015

Bay windows with curves bends and bows

Bay windows come in many shapes/sizes. They can be a compact 6 feet wide up to 20 feet or more wide with two angles or many angles.
A Creative Touch Draperies & Interiors has had the opportunity to make window treatments for several types/shapes of bay windows. Some clients wanted to have a once piece valance installed while others wanted a full coverage drapery. The designs are only limited by one's imagination.
There are many types of hardware that are useful on bay windows to create a one piece system that follows the contour of the angles and bends.
One of my favorite vendors for bay window hardware is Brimar Inc.
Below is a photo of a window with blackout drapery installed on a tray ceiling with Brimar Inc hardware ceiling mounted. Installing it ceiling mounted allows a very low profile and no light can leak through the top of the rod.

Brimar hardware has a very low profile allowing for blackout in the master bedroom
This is a hand drawn system with ball bearing glides for ease of opening/closing

The bay window shown in the next two photos was 27 feet wide with 9 angles.  The client wanted a one piece balloon valance with fringe.  The total finished width on this valance was over 50 feet! It was a challenge to install also.  We ended up using a Kirsch 5" wide continental rod with corner connectors. Access slots were created on the back side of the rod pocket and the valance was slid onto each rod section one-at-a-time and that section was then attached to the support bracket on the wall.  Once the valance was on the rod, it was dressed and each gathered section had to be tied to the proper height.  It was worth it! The client was thrilled with the outcome.
Bay window 27 feet wide Right side
Bay window 27 feet wide Left side

On the next two photos below, the curve of the wall posed a challenge. The curve is approximately 38 degrees. Instead of custom bending a 14.5 foot rod on-site we used two 8 foot pieces of flex board joined together with flat metal joiner brackets. The flex board comes in several widths and in this case we used 6" width and installed in to the wall with Kirsch brackets.  This allowed the window treatment to follow the exact curve of the wall.  The valance was velcro'ed to the front of the flex board for easy removal and cleaning.
This window is a curved bay and is 175" wide

This window is curved and is 168" wide
Sometimes simplicity is best to showcase the beauty of a fabrication as seen below in the photo of blocked drapery panels on this dining room nook area.  As always, blackout lining was used to prevent unsightly holes showing up on the front side of these panels. The headers were kept simple by making the panels flat without pleats.  This also uses less fabric.  Because these panels were going to be decorative only (they stay open all the time) the client chose to make them flat without pleating.
Dining nook area with flat blocked decorative drapery panels
Below is a photo of drapery panels installed on finial knobs using Kirsch's finial installation kit. This kit allows you to use the machined screws (flat ends not pointed) on the finials to attach to the wall and are used as a decorative feature. There are actually six panels with one not shown in the photo. The master bedroom reading nook shown here was made up of 5 windows and 3 different sizes and is well over 12 feet total width. Each panel shown is one width wide with blackout lining and interlining for additional body. The photos here do not do this install justice--the panels were stunning and this client was very happy with the result.

This window has six drapery panels installed one is out of view
Though the next photo is not technically a bay window, it was part of the installation above. The panel shown in the corner was made with almost 2 widths. I had to experiment with the right width to make this and it came out about 12 inches less than a full 2 widths wide.
This window is a corner window
 
The photo below demonstrates a 14 foot wide bay window with decorative blackout drapery panels installed and rod pocket sheers beneath the panels.  A Creative Touch Draperies & Interiors uses blackout lining on the decorative panels to prevent unsightly bar mark holes from showing through on the right side of the drapery fabric. Also, the fabric's color shows up so much better with blackout as a lining.  The sheers were installed with a Kirsch heavy duty standard rod and was custom bent on-site for the best possible fit.


Sunday, December 7, 2014

Two sided drapery panels

What are two-sided drapery panels anyway? I think it's a thing in the south mainly, but I was educated by my client. She wanted to have a drapery that had colored face fabrics on both sides. This allowed you to see a beautiful fabric from the outside of the home as well as from the inside. The two fabrics she selected for this design are shown below.

Two sided drapery panel fabrics
The two sided drapery weighed quite a bit (over 50 lbs) due to the layering of interlining and black sateen plus the two fabrics. The black sateen plus interlining did two things:
1) Prevented light from shining through the fabric and showing every pinhole and flaw
2) Added body, fullness and hand to the overall drapery making it hang beautifully
Due to the weight of the drapery, a strong drapery rod was needed.
We used the Kirsch's Wrought Iron Collection shown in the photo below:


 The drapery would be installed in a breakfast nook on a bay window with 2 angles, so we added an elbows to accommodate the bend.


Saturday, December 6, 2014

4 Bend Bay with casement windows and low overhead room can be a challenge

Bay windows, especially bays with more than 2 angles can pose a challenge when designing window treatments.  Another issue that can add a challenge is the addition of a tray ceiling with a bay.  This bay also had casement windows with transoms. This client wanted blackout draperies installed.  Also, note the low amount of space above each of the windows as well as the narrow width of the first level of the tray ceiling (less than 1 1/2"). 
To resolve the issues with this window, we decided to install the hardware onto the second level of the tray ceiling.
1) To add height to the room we bring the header of the drapery up above the window
2) Assist with blackout--less light can leak in with the additional drapery heading height above the window top edge.
3) To allow the treatment to be mounted out away from the wall/window for easy travel across the hardware track (the first level of the tray was only 1 1/2" width and the second level tray was 3" wide)


"Before" custom made drapery was added.  Note the small space above each window and the tray ceiling and 4 bends.

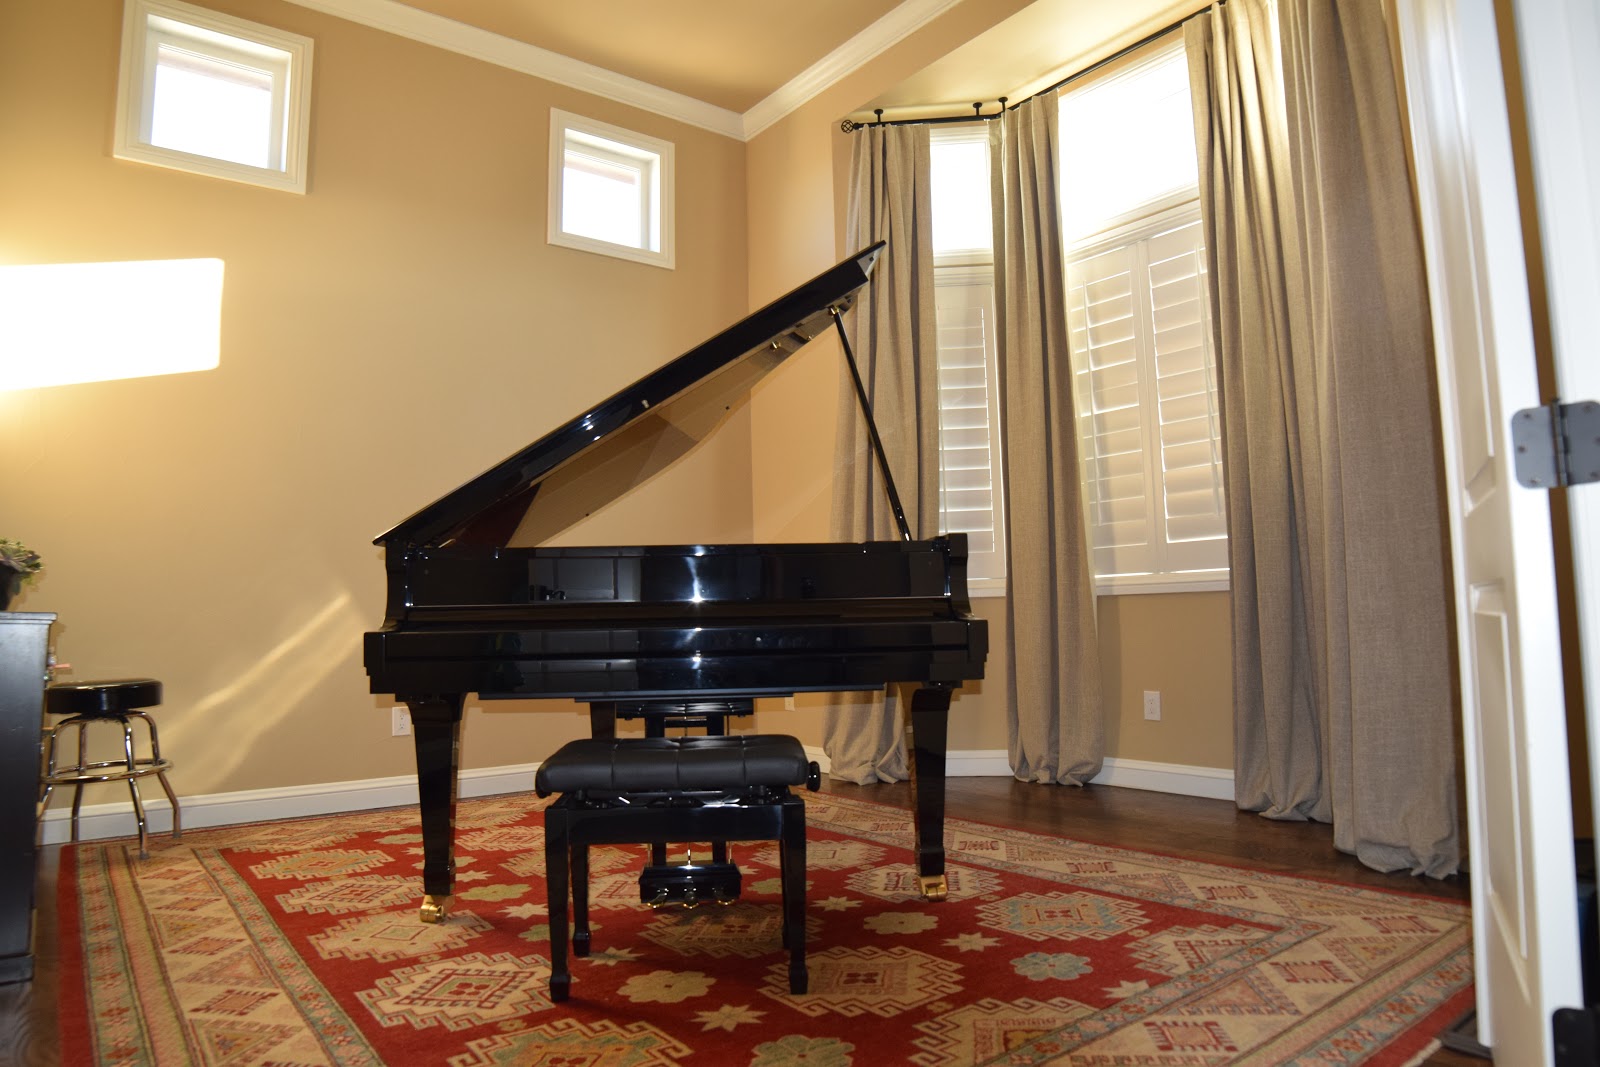
"After" we installed the custom drapery it really added warmth to the room as well as height.


We chose a low profile sleek drapery rod from Brimar Inc that allowed very little light to leak out at the top of this treatment.  This rod has a 3/32" gap between the bracket, rod and ceiling. The rod has high quality ball bearing slides that move the drapery across the rod.  Small children in the home as well as multiple bends did not make use of cords optimum for this family.  Instead we used 48" wands attached behind each of the 4 panels.

Photo showing the drapery completely closed demonstrating the sleek look of the hardware installed on the second level of the tray ceiling ledge.

 This photo demonstrates the way the drapery is installed -- very sleek on the second level of the tray ceiling.


This photo demonstrates two of the  four bends of the bay and how the corners of the drapery heading needed to be modified and custom fit to the tray ceiling ledges for a complete blackout effect!
Also in this install were 2 roman shades on another window. I will post them later.

The clients were very happy with the results and say they sleep so much better now!